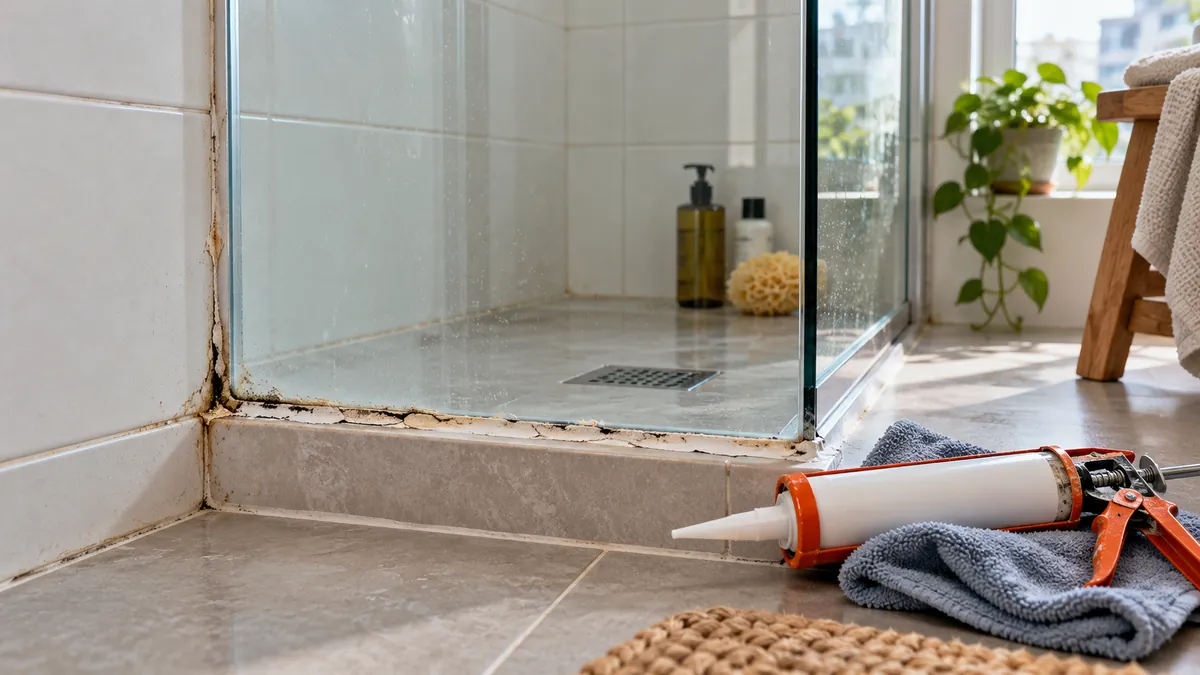
A dark or loose joint around a shower screen is easy to dismiss as a cosmetic problem. Sometimes it is only old sealant that no longer grips the surface. Sometimes the joint is opening because the tray moves, water escapes through an adjacent defect, or a tiled assembly was never made watertight. Adding a bright new line of silicone over the old one may hide the evidence without solving anything. Before ordering a repair, identify where the water appears, which joint is affected, and whether the area can dry. This guide distinguishes a local reseal from work that needs a tiler, plumber, or waterproofing specialist.
Map the moisture before removing anything
Photograph the joint in daylight before cleaning. Mark whether the gap is between glass and tile, tray and wall, wall and floor, or around a fixture. Note when water appears: during a shower, only after prolonged use, or even when the bathroom has been idle. Look outside the enclosure at the adjacent skirting, cabinet, door frame and room below, if you can access it. A wet patch in another room changes the job from cosmetic resealing to leak investigation. Do not keep showering over a suspected active leak while waiting for a convenient date.
A black mark does not automatically mean the whole wall has failed. Surface residue, stained sealant and moisture behind a loose bead can look similar. Conversely, a neat-looking bead does not prove the substrate is dry. A homeowner can take photos and report patterns without making a diagnosis from appearance alone. If tiles sound loose, grout is falling out, the tray flexes, or water reaches an adjoining room, ask for inspection of the whole junction rather than a tube of silicone.
What silicone can and cannot seal
Flexible sealant is suitable for certain changes of plane and compatible fixture joints. It accommodates movement differently from rigid grout. It is not a replacement for the waterproof layer under a tiled shower. Tile and grout alone do not form a complete waterproof system; a Schluter explanation of tiled showers describes how drainage and membranes work beneath the visible finish. If the substrate or drain connection fails, a surface bead may divert water for a while but will not rebuild that system.
Identify the joint material before ordering. A grout line between tiles is not the same as a flexible corner joint. Some apparent “silicone failures” are cracked grout, adhesive residue, or a glass profile leaking through its own drainage path. Covering weep openings in a shower screen can trap water. A professional should explain which lines will be removed and renewed, and which openings are intended to remain free. If several junctions need work, ask for a marked photograph, not a vague instruction to “seal everything.”
Why a new bead peels early
New silicone adheres poorly to old silicone, soap film, grease, dust, or a damp substrate. The DAP bathroom sealant instructions call for removing the old caulk, cleaning the joint, rinsing and allowing it to dry before applying the new product. That sequence matters more than choosing the thickest bead. A joint that moves excessively, has a loose tray, or lacks a suitable backing can also open again. The cure depends on the chosen product and conditions; do not use a universal “ready after one hour” promise from a different tube.
Aggressive scraping can scratch acrylic trays, glass coatings or glazed tile. Strong chemicals can damage neighbouring finishes and leave residue that prevents bonding. If the substrate is natural stone, metal or a special polymer, product compatibility matters as much as the word “bathroom” on a package. Ask the worker what sealant is proposed for the actual surfaces and whether the manufacturer's preparation and cure instructions will be followed. A neat edge on the day of application is only one measure of success.
A sensible reseal sequence
First, stop the water source and allow the work area to dry. The worker removes loose and old sealant without damaging the finishes, cleans residual film, checks the joint and lets it dry sufficiently for the specified product. Deep or wide joints may need suitable backing rather than a massive fill of silicone. Nearby edges can be masked to keep the line straight. The bead must contact both intended sides continuously; a strip sitting on top of dirt will pull away. The installer finishes the joint and removes masking in the window given by the product instructions.
Before the shower is used again, observe the cure or water-ready period for that exact sealant. A different brand or formulation can have a different time, and a cool or poorly ventilated room can alter conditions. Keep the product name or photograph its label. Ask the worker to show any uncovered movement, void or wet substrate before it is hidden. If the joint was renewed because of a reported leak, agree when and how the area will be tested, and do not describe an untested seal as a proven waterproof repair.
When resealing is not enough
Recurrent peeling in the same spot calls for a cause, not a third identical application. A moving tray, unstable glass frame, cracked tile, damaged grout, defective drain connection or failed waterproofing layer may be responsible. Water can travel behind finishes and emerge far from its entry point. If a ceiling below is wet or a cabinet swells, request leak diagnosis with a defined inspection plan. A tiler may need to assess tile and membrane, while a plumber checks supply and drain fittings. A handyman can renew a sound accessible joint but should not promise to correct an unseen waterproofing fault without investigation.
Do not approve demolition solely because one silicone line looks tired. The opposite mistake is also costly: asking a cleaner to bleach an open joint repeatedly while water keeps entering. A useful inspection starts with symptom history and accessible checks, then recommends opening only where justified. The bathroom renovation guide explains how hidden waterproofing and plumbing should be included in a wider scope. The grout renewal guide helps distinguish tile joints from fixture joints.
How to request and compare the work
Send close photos of the joint, a wider shot of the enclosure and any damage outside it. Describe the length of the affected line, materials on both sides, whether the tray moves, and how long the area can remain unused. Ask the professional to separate diagnosis, sealant removal, preparation, new material, cure time and leak testing in the quote. If parts must be dismantled, clarify who removes and reinstalls them. A low price for “silicone” may exclude old-material removal and the time needed for drying.
For a rental or a new renovation, keep the dated photos and previous invoice before work begins. Tell the landlord or original contractor about water damage promptly and agree how the investigation will be documented. When comparing offers, avoid relying on an unsupported guarantee that every leak will disappear after resealing. Request the proposed product, accessible area, exclusions and next step if the substrate is found wet. Post a tiling or bathroom task with the observed symptoms so candidates can say whether they handle diagnosis as well as the visible joint.
Accept the repair with the right test
At handover, the bead should be continuous, attached to the intended surfaces and free of gaps, smears that block drainage openings, and damage to nearby glass or tile. Keep the area dry for the specified period. Afterward, test under normal shower conditions while checking the outside edge and any previously wet location. One dry test does not prove a concealed membrane is sound forever, but it can show whether the local repair addressed the immediate symptom. If water reappears, photograph the timing and place before another layer is applied.
A sound local reseal has a clear starting condition, compatible material, proper preparation and a documented result. Where movement or hidden water is involved, the valuable service is diagnosis and an honest scope. That is how you avoid paying for repeated cosmetic lines while the bathroom continues to leak.
Internal links
Useful pages on this topic
Frequently asked questions
- Can I apply new silicone over old silicone?
- Normally the old material is removed and the joint cleaned and dried as the selected product directs.
- Does a black joint prove a hidden leak?
- Not necessarily. Wet adjacent rooms or a moving tray do require further diagnosis.
- Can silicone replace shower waterproofing?
- No. A surface bead cannot rebuild a failed membrane beneath the tile.
- When can the shower be used again?
- Follow the water-ready or cure period for the exact sealant and site conditions.