🧹Cleaning
Removing Paint and Grout Residue After Renovation
By KABLAY Editorial · · 12 min read · Updated:
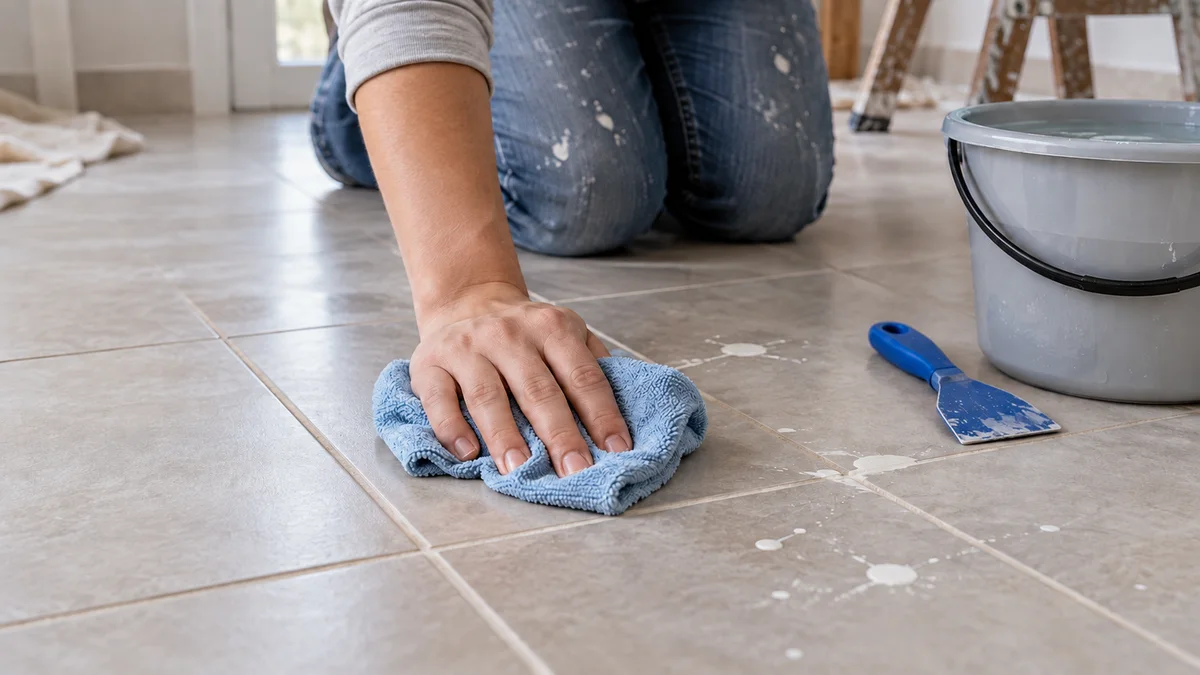
A renovation can look finished while the floor still has a cloudy film and the window frames carry small paint spots. Ordinary mopping may move the dirt around without solving either problem. A residue removal job starts with two questions: what is on the surface, and what is the surface made from? The answer determines the method, the time needed and whether a cleaner should proceed at all. This guide helps apartment owners in Israel describe the work, compare offers and inspect the result without turning a new finish into a repair project.
Separate loose dust, paint and grout haze
Photograph the problem in daylight before trying a product. Fine construction dust can settle across many rooms and collect inside tracks and cupboards. Grout haze is residue from jointing work on the tile face; it can remain visible after loose dust has been removed. Paint appears as splashes, drips or a coating on an adjacent surface. Adhesive, silicone and protective film residue are further categories. A single photograph cannot establish their chemistry, so ask the painter or tiler what products were used and keep any remaining packaging.
Mark the affected places on a short room list. For example: white film on bathroom porcelain, two paint drops on a wooden door, and dust in the living room shutters. Do not describe all three as a dirty floor. This makes it possible to ask for a price that covers the actual work and to identify anything outside the cleaner's experience. It also prevents a successful dust removal visit being mistaken for an unsuccessful specialist residue treatment.
Identify the finish beneath the stain
Appearance is unreliable. A floor that looks like stone may be porcelain; a stone countertop may have a coating; glass can have films or a treated surface. Find the invoice, product label or installer details where possible. Include the grout type, sealers and the date of installation. If the material remains unknown, record that uncertainty in the job request instead of confidently choosing a cleaner based on its colour or shine.
Build a surface map before the team starts. List tile, natural stone, timber or laminate, glass, painted metal, plastic profiles and sealant lines separately. An acceptable treatment for one area may be unsuitable for its neighbours. The same bathroom can contain several finishes within a few centimetres. Ask how the cleaner will protect edges and nearby fittings rather than treating an entire room as a uniform washable box.
New grout and paint need a timing check
Ask the installer when cleaning is permitted under the product instructions. Touch dry paint is not necessarily ready for wet cleaning or friction, and a freshly installed joint may need more time before a particular cleaning treatment. There is no single waiting period that fits every paint, grout, temperature and room condition. The manufacturer's instructions and the actual site conditions should decide the sequence.
If a delivery deadline falls before the finish is ready, split the work. Loose dust and other unaffected rooms may be cleaned first, with the delicate area scheduled later. Confirm whether a return visit is included. This is easier to organise before movers arrive than after cabinets and boxes block access. For the wider handover checklist, see the guide to cleaning an apartment before moving in.
Remove loose grit before working on a mark
Start with a method suitable for collecting construction dust and loose grit from that surface. A gritty cloth can drag particles across a glossy finish. Change cloths and cleaning water as the work progresses, and keep tools used on rough areas away from polished or delicate ones. Ask the team how it will handle corners, tracks and the edges of protective coverings, where debris often remains hidden.
Do not use wet cleaning as a substitute for removing piles of debris. Identify who takes away packaging and trade waste, and whether the cleaning quote includes disposal. After the loose material is collected, inspect the remaining film again. Some areas may now be clean; others may need a separate trial. This staged approach avoids applying a stronger treatment across a whole floor simply because the initial room looked dusty.
Use a small, agreed trial area
A professional should propose a trial on an inconspicuous area of the same material and finish. Photograph it before treatment, note the chosen product and follow its label for compatibility, application and removal. Let the area dry before judging it: a wet surface can temporarily hide changes in sheen. Compare it with an untreated neighbouring area under normal room lighting.
The trial should answer two questions: does the residue come off, and does the original finish remain intact? Stop if the area develops scratching, whitening, colour transfer or a changed gloss. Do not extend an unsuccessful method across the room or assume that extra pressure will solve it. When the material is valuable or uncertain, consult the installer or a surface restoration specialist before authorising a larger treatment.
Cement residue and epoxy residue are different jobs
Grout products have different compositions. The cleaner needs the exact product information rather than relying on a universal bottle labelled for bathroom cleaning. Ask for a treatment approved for that grout residue and the underlying tile. Ready to use grout also needs its own product instructions; it should not be automatically treated as ordinary cement residue.
MAPEI's grout haze guidance distinguishes cleaning approaches by grout type. Use that as a reason to identify the installed product, not as permission to transfer a recipe to an unknown floor. Your cleaner should also explain how the treatment will avoid damaging the joints, sealants and adjacent finishes, and how it will be removed afterwards.
Natural stone needs particular care
Do not use an acid or a vinegar mixture on an unidentified stone surface. MAPEI warns that vinegar can etch marble, travertine and limestone. A dull patch caused by damage is different from dirt and may require restoration. A cleaning promise to make everything shine should therefore begin with material identification and a compatible trial.
Ask separately about stone skirting, thresholds and countertop edges, even when the main floor is porcelain. Protect these neighbouring areas during treatment. If previous attempts have already changed the surface, photograph the marks and disclose the products used. The next contractor needs that history to assess the work; otherwise a pre-existing dull area can be confused with a newly caused problem.
Paint spots on frames, glass and doors
Give the cleaner the paint name if it is known, and distinguish fresh splashes from hardened deposits. Do not assume that a solvent suitable for removing the paint is also safe for the substrate. Plastic profiles, coated metal, varnished timber and glass films can respond differently. Start with the surface manufacturer's permitted method and a trial. When neither the paint nor the finish can be identified, ask the painter or window installer for advice.
A metal blade is not a general solution for every window. Unknown coatings and finishes need particular caution. Mechanical tools, including plastic scrapers, should only be used when the surface instructions permit them, with a suitable trial. Do not scrape across seals or pry at frame edges. Paint on a door may require a painter's correction if removal would damage the door's own finish; the cleaning quote should make that boundary clear.
Protect the surrounding room and organise access
Move belongings away from the treatment zone and decide who covers furniture, cabinets and adjacent floors. Keep waste and cleaning residues away from areas that are not part of the job. The team should follow product disposal instructions rather than improvising disposal into a drain. Ask about ventilation, protective equipment and access requirements before agreeing to a method. Never mix cleaning chemicals; use each product according to its label.
Window exteriors, high sections and difficult balcony access need their own assessment. A stain does not justify reaching out of a window or improvising a platform. Specify which surfaces can be reached safely from inside and price specialist access separately if required. In a furnished apartment, agree where equipment will stand and how treated floors will be kept clear while they dry.
Compare a written scope, not only a total price
Send the same photos and material list to every contractor. Ask which marks are included, whether a trial is charged, how many visits are anticipated, who supplies products and whether VAT and waste removal are included. If the quote is hourly, ask for an estimated range and a point at which the team must contact you before continuing. If it is fixed, specify the conditions that can change the price.
Separate routine cleaning from specialist removal and restoration. A contractor may reasonably decline an unknown or damaged finish. Prefer a clear limit and a documented trial to an unconditional promise to remove every stain. You can use the cleaning category on Kablay to describe the apartment, the affected areas and the materials, then compare the responses on the same basis.
Inspect after drying and keep the care instructions
Walk through the treated areas after they have dried, using ordinary daylight and the room's usual lights. Compare the trial area, the remaining floor and the before photographs. Check corners, thresholds and nearby fittings, not only the middle of the room. Look for remaining residue and any change in texture or sheen. Record items that need another visit and agree on the next step before furniture hides them.
Keep the product names, the agreed method and any maintenance instructions with the renovation documents. A finished job should leave you knowing what was removed, which surfaces were treated and which marks require a different specialist. That record helps with future cleaning and makes a later discussion with the painter, tiler or landlord much easier. The useful goal is a clean apartment with its intended finishes preserved, supported by a scope that both sides can check.
Internal links
Useful pages on this topic
Frequently asked questions
- Why does a cloudy film remain after mopping?
- It may be grout or another product residue rather than loose dust. Identify the deposit, the tile and the installed product before agreeing to a compatible treatment trial.
- Can one cleaner remove marks throughout the apartment?
- Compatibility cannot be assumed across tile, stone, timber, glass, plastic and painted fittings. Check each material's instructions and protect neighbouring surfaces before choosing a method.
- How is epoxy grout residue removed?
- Choose the method using the exact grout product and the underlying surface. Do not automatically use a cement haze treatment; request manufacturer guidance and a small trial.
- What information is needed for a quote?
- Provide photos, a room by room residue list, finish details and installation dates. Ask about the trial, visits, access, products, VAT and the boundary between cleaning and restoring damaged finishes.