🔨Handyman
Wardrobe Assembly in Modi'in: Parts and Installation
By KABLAY Editorial · · 12 min read · Updated:
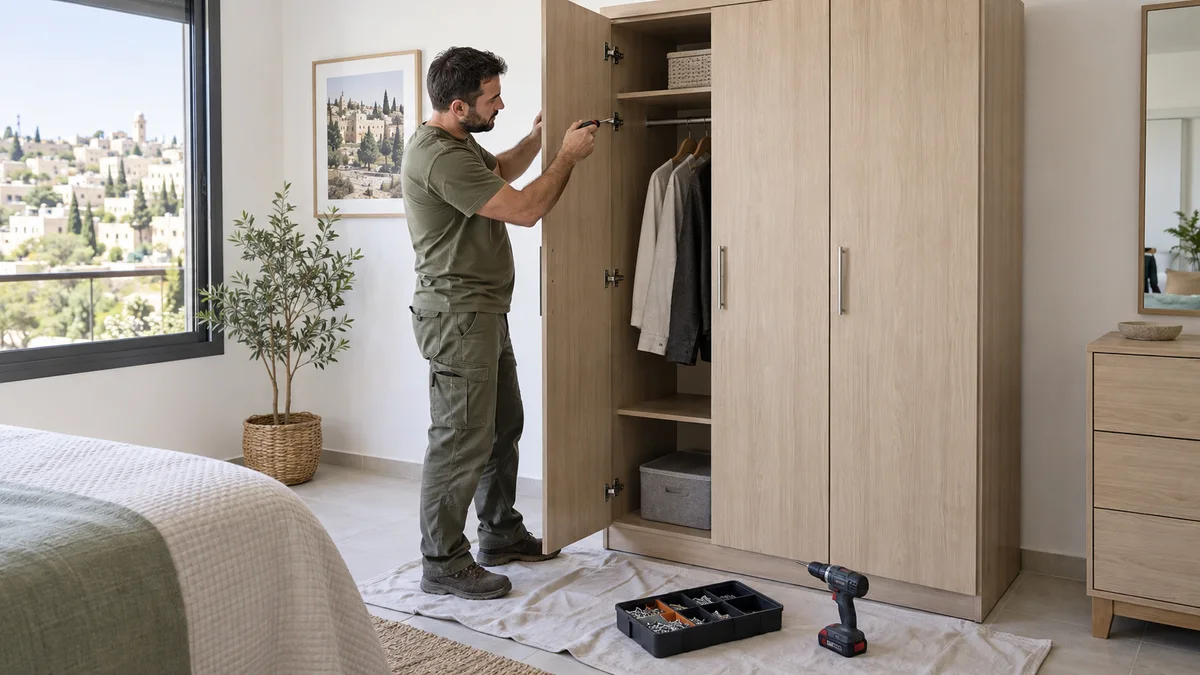
Wardrobe assembly in Modi'in starts before a handyman arrives. The model, complete parts, room dimensions and installation method need to be known. Having boxes does not establish that the chosen wardrobe can be assembled and correctly secured where you want it. A useful booking covers the carcass, doors, internal fittings, specified wall restraint and normal operation checks.
This guide helps prepare the apartment and compare offers. For other household tasks, see the handyman services guide. Here the focus is delivery, assembly space, following the product instructions and a clear handover, rather than a universal completion time for every model.
Provide the model and assembly instructions
Give the manufacturer, product reference, dimensions and door type. Send a link to the instructions or photographs of relevant pages if you already have them. Wardrobes of equal width can use different bodies, connections and sequences. Sliding doors, mirrored panels and ordinary hinged doors also need different handling and working arrangements.
Do not replace those details with standard wardrobe. List drawers, shelves, rails and added sections separately. If the purchase is not final, check suitability for the location before booking the final assembly scope. This reduces the chance of an installer arriving for one task and finding a different construction.
Measure the room and usable access
Measure the intended width, depth and height, plus the approach and nearby door opening. Account for skirting, projections and everyday use. Finished dimensions are not necessarily the space needed to assemble and raise the furniture; required clearances should come from the actual system’s instructions rather than a general estimate.
Show the ceiling and floor at the chosen position. Mention visible slope or unevenness in advance. Do not plan to compensate with a random piece of packaging. Levelling must suit the construction. If the position changes on arrival, check access, restraint locations and door movement again before installation begins.
Coordinate delivery to your Modi'in apartment
Confirm delivery before the assembly date and leave time to inspect the boxes. Describe the floor, lift, passage width and whether packages will be carried into the correct room. Your address conditions matter more than a general service advertisement for Modi'in. If the carrier leaves the load at the entrance, carrying it upstairs is not automatically the assembler’s responsibility.
Large panels, glass and mirrors need appropriate handling. Discuss assistance and safe placement. Avoid booking around an unconfirmed delivery, as waiting and a return can change the cost. Share the exact address and access arrangements with your selected provider through the appropriate contact, keeping unnecessary private details out of the public request.
Check the complete kit before starting
Compare the box count and labels with the order. Note visible package damage, missing hardware bags and broken components. Keep documents and packaging after opening. If a part is missing, ask the supplier about a suitable replacement and whether a particular stage can proceed. An improvised fixing may not meet the system’s requirements.
For used furniture, describe its dismantling history and photograph the connections. Missing pieces, enlarged holes and old alterations affect reassembly. Reinstalling used furniture is different from opening a new complete kit. The installer needs to assess component condition rather than promising to restore any construction from one general photograph of its front.
Clear working space and protect the finishes
Clear the area, remove fragile belongings and agree floor protection. Panels should be placed without damaging edges or blocking the only passage. Establish who moves a bed or other heavy furniture. Do not assume enough workspace will appear during the visit without extra time or assistance.
Keep children and pets outside the tool and component area. Do not fill the body with clothes or start using it before the specified installation is finished. Agree a location for packaging and spare pieces so inspection remains possible. For several furniture items, identify which boxes belong to each task instead of mixing similar hardware sets.
Wall restraint belongs in the installation scope
If the manufacturer requires a tip-over restraint, include it in the booking. An assembled carcass is not a substitute for completed installation to the instructions. Wall construction affects the hardware, and the furniture kit may not include suitable wall plugs for the actual substrate. Check the wall and agree on the necessary components before declaring the job finished.
IKEA’s wall securing guidance recommends following the item’s instructions and using hardware suitable for the actual wall. It does not make one restraint system appropriate for every wardrobe and partition.
Identify sockets, known utilities and location constraints. Hidden routes and the substrate need assessment before drilling. If a fixing point is unsuitable, discuss a suitable solution or position instead of omitting a required restraint to save time. The wall mounting guide explains related substrate questions.
Specify the doors and internal fittings
With hinged doors, check orientation, handles and the space needed in front. With sliding systems, identify tracks, stops and the model’s adjustment sequence. Do not ask for a similar-looking part to replace a specified component solely because it is available. Mirror and glass elements should be disclosed before the visit.
Shelves, clothes rails, pull-out baskets and drawers must suit the purchased system. Decide heights and positions where the design allows a choice. Assembly and door adjustment are related, but repairing faulty existing hardware can be separate work. If a door resists movement, do not force it; first establish the cause and permitted adjustment.
Compare the whole installation quote
Compare offers using the model and full fittings list. Construction, section count, doors, internal equipment, access and component condition affect the scope. A price per wardrobe without those details is difficult to compare. If the wall is still unknown, state how hardware and any extra stage will be confirmed after assessment.
- Assembly of the body, doors and listed internal fittings.
- Carrying parts into the room and any assistant required.
- Substrate assessment and specified restraint with suitable components.
- Adjustment, working-area cleanup and packaging removal.
- Total, VAT where applicable and a return charge if components are missing.
List old wardrobe dismantling and disposal separately, since they may need space and time before new assembly. If a damaged panel is discovered, agree on the remedy and cost before repair. A general assembly booking should not become permission to alter the product through a method neither discussed nor specified by its manufacturer.
Reassembly after a move needs its own assessment
Keep fixings, labels and photographs of the old arrangement. Say who dismantled the furniture and whether the instructions are available. Damage to a back panel, edge or connector affects possible reassembly. Use the words reinstallation of used furniture so the provider does not assume a new complete package.
Assess the new position and wall even if the wardrobe was stable previously. A different floor and restraint location can need another solution. If part of the construction is unsuitable, a pause and replacement are better than concealing the problem until it is loaded. Retaining old components is useful information, not proof that they remain fit for use.
Check normal operation at handover
Compare the completed fittings and positions with the booking. Look at faces, edges, correct door positions, drawers and shelves. Ask to see the finished required restraint and load limits from the instructions. Do not test with body weight, hanging from a door or opening all pull-out components at once.
Operate every door and drawer normally. Items should not catch their neighbours because of an unagreed assembly change. If the body moves noticeably or a connection is damaged, stop using it and contact the installer. Keep the instructions, work description and appropriate spare components so later care does not begin with guessing the model.
A Modi'in handyman request
You could write: “Wardrobe assembly in Modi'in. Model, instructions, dimensions, location pictures and box list attached. Delivery is confirmed and components will be in the room. Include doors, internal drawers, specified wall restraint and adjustment. The wall needs assessment. List carrying assistance, hardware, packaging and a possible return for missing parts separately.”
Compare responses on the Modi'in handyman page against that kit and location. If a television mount is also needed, use its separate installation requirements. A useful request connects the product, room and installation; the final check covers what was actually agreed.
Internal links
Useful pages on this topic
Frequently asked questions
- What details help quote wardrobe assembly in Modi'in?
- Send the model, dimensions, instructions, internal fittings list and room and box photographs. Include delivery, access and component condition, especially for reassembly.
- Is wall restraint included in assembly?
- Specify it explicitly where required by the manufacturer. The wall and suitable hardware should be assessed before installation is completed.
- Can assembly start before all parts arrive?
- Only where the installer and instructions permit a particular stage. Establish the missing components, possible progress and return cost first.
- How should I inspect the assembled wardrobe?
- Check completeness, normal door and drawer operation, completed restraint and load limits. Do not use body weight or other extreme tests.